
Here is a number most med spa owners never calculate when exploring med spa design ideas: the revenue difference between a practice that looks premium and one that does not.
Two practices in the same market. Same providers. Same treatments. Same Allergan pricing tier. One charges $14 per unit of Botox and has patients lining up. The other charges $11 and still has empty slots on Thursdays.
The difference is the experience. And the experience starts with the space.
Your physical environment communicates your brand before a single word is spoken. A patient who walks into a beautifully designed space with thoughtful lighting, premium materials, and a cohesive aesthetic instantly trusts the practice more. They perceive the treatments as more valuable. They are less price-sensitive. They are more likely to rebook, buy retail products, and refer friends.
A patient who walks into a space that looks like a converted dentist's office with fluorescent lights and vinyl chairs forms a different perception entirely — and that perception follows them through every interaction.
This guide covers the med spa design ideas and decisions that impact patient experience, perceived value, and practice revenue. Not just what looks good, but what performs — with med spa interior design implementation steps, cost benchmarks, and common mistakes for every area of your practice.
The Business Case for Great Design
Design is not a vanity expense. It is a revenue investment with measurable returns. Understanding this prevents the most common mistake practice owners make: treating design as an afterthought and then wondering why patients choose the competitor down the street.
The Revenue Impact of Premium Design
| Design Investment | Revenue Impact | How It Works |
|---|---|---|
| Premium environment | 20-40% higher per-unit pricing | Patients perceive higher value = less price resistance |
| Intentional first impression | 15-25% higher rebooking rate | Positive experience drives loyalty |
| Enjoyable space | 10-20% lower no-show rate | Patients look forward to visiting |
| Retail display integration | 30-50% higher retail revenue/visit | Products are visible and accessible |
| Instagram-worthy spaces | $5,000-$20,000/year in free marketing | Patients photograph and share |
| Premium consultation rooms | 10-15% higher consultation conversion | Confidence-building environment |
Cumulative impact: A practice investing $200,000-$400,000 in premium design for a 2,500 sq ft space can generate $100,000-$300,000 in additional annual revenue through higher pricing, better retention, increased retail sales, and organic social marketing. The design pays for itself in 1-3 years and generates returns for a decade.
Design ROI by Area
Not all design investments deliver equal returns. Prioritize based on patient visibility and impact:
| Area | Patient Visibility | Revenue Impact | Priority |
|---|---|---|---|
| Reception / waiting area | Highest (first and last impression) | Highest | 1 |
| Lighting (entire practice) | Highest (affects every space) | Very high | 2 |
| Treatment rooms | High (where value is delivered) | High | 3 |
| Consultation rooms | High (where buying decisions happen) | High | 4 |
| Retail displays | High (where add-on revenue lives) | Medium-High | 5 |
| Hallways and transitions | Medium | Medium | 6 |
| Restrooms | Medium (telling detail) | Medium | 7 |
| Back-of-house | Low (staff only) | Low | 8 |
Med Spa Design Ideas: Core Principles
Before choosing finishes and furniture, understand the principles that guide effective med spa design. These principles prevent the most common design mistakes and ensure every dollar spent contributes to the patient experience.
Principle 1: Medical Credibility + Spa Luxury
A med spa exists in the tension between clinical and luxurious. Too clinical and you feel like a doctor's office — cold, sterile, anxiety-inducing. Too spa-like and you undermine the medical credibility that justifies your pricing and differentiates you from day spas.
The best med spa designs lean 60% spa and 40% medical. The luxury comes through in materials, lighting, music, and ambiance. The medical credibility comes through in cleanliness, organization, provider presentation, and subtle clinical cues.
Implementation steps:
- Use warm, natural materials (wood, stone, linen) in patient-facing areas
- Keep clinical elements (sharps containers, medical equipment, sterilization tools) out of sight until needed
- Design treatment rooms that feel like suites, not exam rooms
- Use professional-grade fixtures and finishes — nothing cheap or temporary
- Maintain immaculate cleanliness in every space (cleanliness signals medical credibility)
Common mistake: Going too far in either direction. All-white clinical spaces feel sterile and increase patient anxiety. Dark, moody spa spaces can feel inappropriate for medical procedures. Find the balance.
Principle 2: Sensory Experience Design
Design is not just visual. Patients experience your space with all five senses, and each one affects their perception.
| Sense | Elements | Premium Example | Budget Example to Avoid |
|---|---|---|---|
| Sight | Lighting, colors, textures, organization | Layered warm lighting, cohesive palette | Fluorescent overheads, mismatched decor |
| Sound | Music, ambient noise, equipment sounds | Curated playlist on commercial system | Radio with ads, buzzing lights |
| Smell | Scent diffusion, product aromas | Subtle signature scent via commercial diffuser | Plug-in air freshener, strong cleaning chemicals |
| Touch | Furniture comfort, temperatures, linens | Heated treatment beds, plush towels | Cold vinyl chairs, paper gowns |
| Taste | Beverages, refreshments | Cucumber water in glassware, espresso | Water cooler with paper cups |
Design for all five. A beautiful room with fluorescent lighting buzzing overhead and the smell of isopropyl alcohol is not a premium experience.
Principle 3: Patient Flow and Privacy
Every interaction in your practice should feel intentional and private. Patients — especially new ones — feel vulnerable in a med spa. They are there because they want to change something about their appearance, and they do not want to feel exposed.
Implementation steps:
- Design hallways so patients never walk past other patients mid-treatment
- Soundproof consultation rooms (this is where financial and personal discussions happen)
- Ensure payment and checkout conversations cannot be overheard
- Eliminate bottlenecks where patients in robes encounter patients in street clothes
- Create separate entry/exit paths for treatment areas if possible
Patient flow diagram considerations:
| Zone | Who Is Here | Privacy Level | Design Approach |
|---|---|---|---|
| Entry/reception | All patients, visitors | Low | Open, welcoming, branded |
| Waiting area | Pre-treatment patients | Medium | Comfortable, separated seating |
| Consultation room | Patient + provider | High | Private, soundproofed, comfortable |
| Treatment hallway | Patients in robes/gowns | High | No cross-traffic, minimal visibility |
| Treatment room | Patient + provider | Highest | Private, door locks, no windows to hallway |
| Checkout area | Post-treatment patients | Medium | Semi-private, not at main reception |
Principle 4: Cohesive Brand Expression
Every design element should reinforce your brand positioning. If your brand is "modern luxury," your space should reflect that in every detail — from the font on your signage to the type of hangers in the coat closet.
Brand-to-design translation:
| Brand Position | Design Direction | Materials | Color Palette | Lighting |
|---|---|---|---|---|
| Modern luxury | Clean lines, warm accents, premium everything | Quartz, warm metals, performance velvet | Warm neutrals + gold accent | Warm, layered, dimmable |
| Clinical excellence | Organized, professional, high-tech | White surfaces, glass, stainless | White + navy or charcoal | Bright, clean, professional |
| Wellness sanctuary | Organic, calming, nature-inspired | Natural wood, stone, linen | Earth tones, greens, warm whites | Natural light priority, soft |
| Bold contemporary | Dramatic, editorial, statement-making | Dark finishes, sculptural pieces, brass | Dark + contrast color | Dramatic, accent-heavy |
Inconsistency kills perceived value. A beautiful waiting area connected to a treatment room with dated equipment and a paper gown on a plastic chair sends a contradictory message. Every touchpoint must match.
Med Spa Waiting Room Design and Reception Area
The reception area sets the first impression. It is the most important design investment you will make.
The Reception Desk
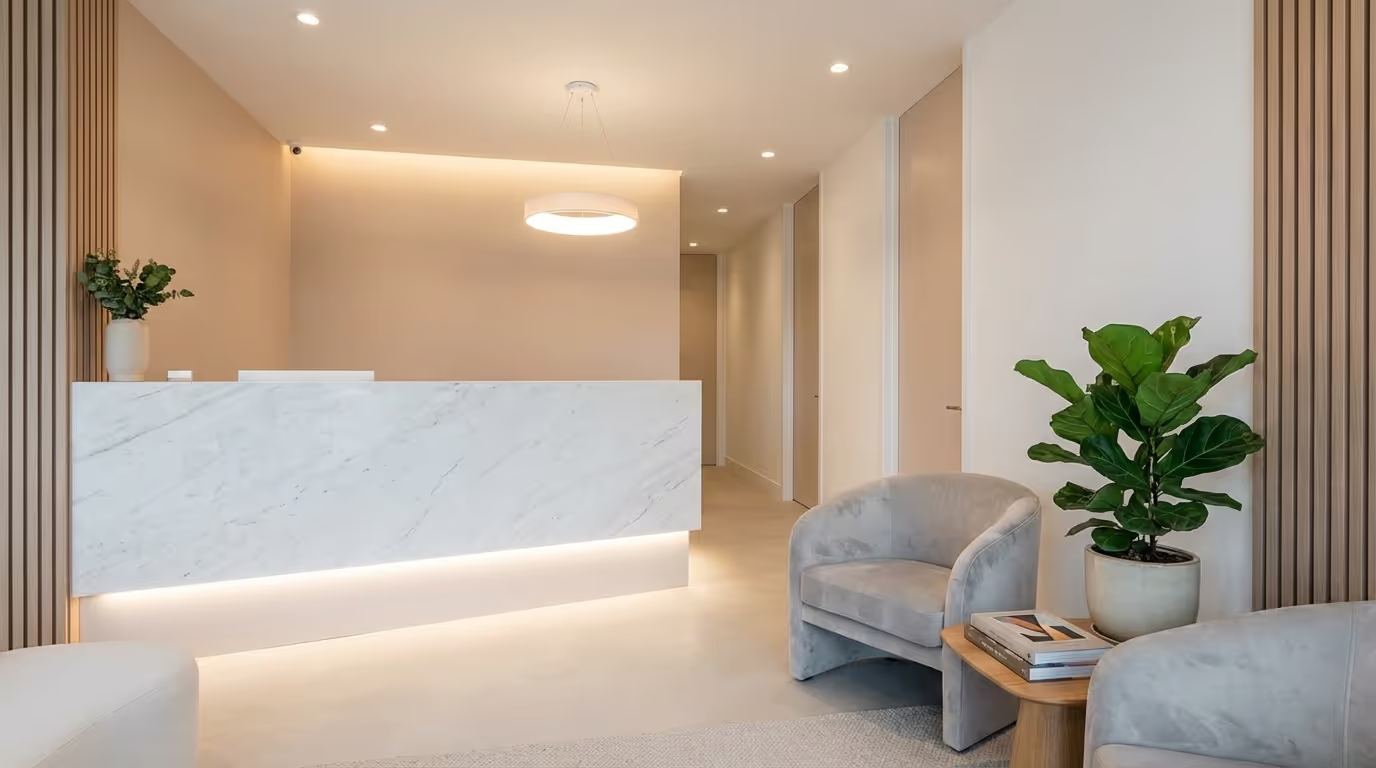
Ditch the traditional medical office check-in counter. Your reception area should feel like the lobby of a boutique hotel, not a doctor's office with a sliding glass window.
Design direction:
- Open desk design — no barriers between staff and patients
- Premium materials: natural stone countertop, wood or metal base, integrated lighting
- Clean surface — no visible paperwork stacks, no cluttered computer monitors facing the patient
- Consider a concierge-style setup where the receptionist comes around the desk to greet patients
- Integrated technology: screen for check-in, tablet for consent forms, hidden cable management
Dimensions: Allow at least 6 feet of width for the reception area, with enough counter space for one or two check-in positions that are spaced apart for privacy.
Budget range: $3,000-$15,000 for a custom reception desk. Prefabricated options from commercial furniture suppliers run $1,500-$5,000.
Waiting Area
Most patients wait 5-15 minutes before their appointment. This time should enhance the experience, not diminish it.
Seating:
- Individual chairs or two-seaters, not long bench-style seating (patients do not want to sit shoulder-to-shoulder with strangers)
- Upholstered in a durable, stain-resistant fabric that still feels premium (performance velvet and high-grade faux leather work well)
- Accent chairs in a complementary color that pops against your neutral palette
- A mix of seating types — armchairs, a loveseat, a couple of individual chairs — creates visual interest and gives patients options
- Budget: $500-$2,000 per seating piece. Plan for 6-10 seats for a typical practice.
Coffee table or side tables:
- Low-profile, clean-lined tables with stone or wood tops
- Skip the magazine rack. Instead, place a curated selection of coffee table books (fashion, architecture, travel) alongside your practice's treatment menu and lookbook
- Fresh flowers or a small arrangement (real, not fake — fake flowers look cheap regardless of quality)
Refreshment station:
| Level | What to Offer | Budget | Patient Perception |
|---|---|---|---|
| Basic | Filtered water, disposable cups | $200-$500 setup | Functional, not memorable |
| Standard | Water with cucumber/citrus, sparkling water, coffee | $500-$1,500 setup | Professional, thoughtful |
| Premium | Full beverage menu: herbal teas, sparkling options, espresso drinks, glassware | $1,500-$4,000 setup | Luxury, memorable |
| VIP | Premium beverages + branded take-home water bottle | $2,000-$5,000 setup | Exceptional, Instagram-worthy |
Walls and display:
- Feature wall with your logo, either backlit or in a dimensional material (metal, acrylic, wood)
- Before and after gallery displayed on a digital screen or as framed prints (not taped to the wall)
- Retail product display integrated into the design — not a freestanding spinner rack
Music and Scent
Music: Curate a playlist that matches your brand energy. Spa playlists are fine for treatment rooms, but waiting areas benefit from something with a bit more life — lounge, ambient electronic, or contemporary jazz at a low volume. Use a commercial music service (Soundtrack Your Brand, Rockbot) to avoid licensing issues. Budget: $20-$50/month.
Scent: Use a commercial-grade scent diffuser (not a plug-in air freshener from the grocery store). Choose a signature scent that is subtle, clean, and consistent. Patients should notice it just barely — enough to register that the space smells pleasant, not enough to identify the specific fragrance. Budget: $500-$2,000 for the diffuser + $30-$80/month for refills.
Common mistake: Using candles with open flames (fire code violation in many jurisdictions), strong scents that trigger allergies, or no scent strategy at all (letting cleaning products dominate the olfactory experience).
Treatment Room Design: Medical Spa Layout Ideas
Treatment rooms are where the actual value exchange happens. They need to support clinical work while feeling like private suites.
Room Size and Layout
Minimum recommended treatment room size: 10x12 feet (120 square feet). This allows comfortable space for a treatment bed, provider stool, side table, and equipment without feeling cramped. For body contouring treatments that require larger devices, plan for 12x14 feet (168 square feet).
Layout priorities:
- Treatment bed centered or slightly off-center, with provider access from both sides
- Equipment and supplies stored in closed cabinetry — nothing on open shelves where patients can see cluttered products and instruments
- A dedicated space for the patient's belongings (a small closet or shelf with hooks)
- Mirror positioned so the patient can see results without having to get off the bed
- Power outlets and data connections hidden but accessible for medical devices
Treatment Bed
The treatment bed is the centerpiece of every room. Do not cut costs here.
| Feature | Standard | Premium | Impact |
|---|---|---|---|
| Frame type | Manual adjustment | Electric with smooth, quiet motor | Provider efficiency, patient comfort |
| Surface | Standard padding | Memory foam or gel padding | Comfort during 60+ min treatments |
| Heating | None | Built-in heating pad | Significant patient comfort upgrade ($200-500 extra) |
| Linens | White cotton | Premium cotton or bamboo in brand color | Perceived quality, brand consistency |
| Blanket | Standard | Weighted blanket option | Calming effect, generates patient comments |
Budget: $1,500-$4,000 for a quality electric treatment table. Heated tables add $200-$500. Premium linens add $200-$400 per room.
Lighting
Treatment rooms need two lighting modes:
Clinical lighting: Bright, true-color overhead and task lighting for providers to see clearly during treatments. LED panels with adjustable color temperature (4000-5000K for clinical work) and dimmable intensity.
Ambient lighting: Warm, dimmable lighting for patient comfort during treatments that do not require bright clinical light. LED strips behind headboards or under cabinetry in a warm 2700-3000K tone create a spa-like atmosphere.
Implementation step: Install a simple lighting control system — a scene selector or smart dimmer that lets the provider switch between "clinical" and "comfort" modes with one touch. Budget: $500-$1,500 per room for a quality lighting setup including dimmers.
Cabinetry and Storage
Closed-door cabinetry is mandatory. Open shelving in treatment rooms shows supplies, products, sharps containers, and equipment that patients do not want to see.
Specifications:
- Soft-close doors and drawers (the click of a cabinet slamming undermines the spa atmosphere)
- Integrated charging stations and outlets inside cabinets so cords are hidden
- Dedicated drawer organizers for frequently used supplies
- A small countertop area for the provider to work on — enough for a tray of supplies, not cluttered with products
- White or neutral interior finish for easy identification of supplies
Budget: $3,000-$8,000 per room for custom built-in cabinetry. Semi-custom options from commercial cabinet suppliers run $1,500-$4,000.
Walls and Finishes
- Feature wall behind the treatment bed: textured material (wood slats, stone tile, fabric panel), large-format art, or a living plant wall
- Remaining walls: clean, neutral paint in a warm tone (warm white, light greige, soft clay)
- Avoid stark white walls — they feel clinical and cold under any lighting condition
- If you brand your treatment rooms with room names instead of numbers ("The Glow Room," "Suite One"), use elegant signage at each door
Consultation Room Design
Consultations are where patients decide to spend money. The environment directly impacts their willingness to commit. A patient consulting in a cold, clinical exam room with fluorescent lights is less likely to say yes than one in a warm, private, professional space.
This room should feel like a private office, not an exam room.
Implementation steps:
- A small table or desk with two comfortable chairs (not a patient sitting on an exam table while the provider stands)
- Eye-level seating — both people at the same height, creating equal footing
- A screen or monitor for showing treatment options, before/after photos, and pricing
- Good lighting that flatters the patient — they are evaluating their appearance in this room
- A high-quality mirror with flattering warm lighting (LED mirror or ring light)
- Privacy — solid walls, a solid door, and enough soundproofing that conversations cannot be heard outside
- Printed treatment plan materials and a branded folder to take home
Consultation room benchmarks:
| Element | Minimum | Recommended | Premium |
|---|---|---|---|
| Room size | 8x10 feet | 10x12 feet | 12x14 feet |
| Seating | Two chairs + small desk | Two armchairs + coffee table | Settee + armchair + display |
| Display | Tablet with photos | 32" wall-mounted screen | 43"+ screen + consultation software |
| Lighting | Dimmable overhead | Overhead + task + mirror lighting | Full scene control |
Budget: $3,000-$10,000 to outfit a consultation room from furniture to technology.
Retail Display Design
Most med spas leave money on the table by treating retail as an afterthought. Strategic retail design increases average transaction value by $50-$150 per visit.
Integration over isolation. Retail displays should be integrated into the flow of the practice — in the waiting area, along hallways, and near checkout — not isolated in a separate retail section that patients have to seek out.
Product merchandising principles:
- Group by concern, not by brand (patients think "I need something for hyperpigmentation," not "I need SkinCeuticals")
- Eye-level placement for highest-margin products
- Tester units available for patients to touch and sample
- Clear, simple pricing — not hidden behind a counter
- Minimal clutter — a curated selection of 15-25 products performs better than a wall of 100 options
Display design:
- Backlit shelving or display cases with warm lighting
- Natural materials (wood shelves, stone bases) that match the overall design
- Signage that is clean, consistent, and on-brand (not manufacturer-provided shelf talkers)
- A "staff picks" or "bestsellers" section that simplifies decisions
Retail design benchmarks:
| Approach | Retail Revenue per Visit | Annual Impact (5,000 visits) |
|---|---|---|
| Products behind counter (ask to see) | $5-$15 | $25,000-$75,000 |
| Basic display shelf near checkout | $15-$35 | $75,000-$175,000 |
| Integrated merchandising throughout | $35-$75 | $175,000-$375,000 |
| Curated retail experience with testers | $50-$100+ | $250,000-$500,000+ |
Budget: $2,000-$8,000 for integrated retail displays (shelving, lighting, signage).
Lighting Design: The Most Underrated Element
If you take one thing from this guide, let it be this: lighting makes or breaks a med spa. More than furniture. More than materials. More than any other design element.
The Three Layers of Lighting
Every room should have three layers:
- Ambient lighting — the overall room illumination. Use recessed LED downlights or indirect cove lighting. Avoid exposed bulbs or harsh fixtures.
- Task lighting — focused light for specific activities. Under-cabinet lights in treatment rooms, pendant lights over the reception desk, display lighting for retail.
- Accent lighting — decorative lighting that creates atmosphere. LED strips behind mirrors, backlit feature walls, display case lighting, battery-operated candles in clinical areas.
Color Temperature Guide
| Area | Color Temperature | Reason |
|---|---|---|
| Reception/waiting | 2700-3000K (warm) | Welcoming, comfortable |
| Hallways | 3000K (warm) | Consistent with reception |
| Consultation rooms | 3000-3500K (warm-neutral) | Flattering while allowing assessment |
| Treatment rooms (ambient) | 2700-3000K (warm) | Spa-like comfort |
| Treatment rooms (clinical) | 4000-5000K (cool-neutral) | Color-accurate assessment |
| Retail displays | 3000-3500K (warm-neutral) | Products look appealing |
| Restrooms | 3000K (warm) | Flattering mirror lighting |
Natural Light
If you have windows, design around them. Natural light makes spaces feel larger, cleaner, and more welcoming. Use sheer curtains to soften direct sunlight without blocking it. If your space has limited natural light, consider daylight-simulating LED panels in the ceiling — these are increasingly convincing and significantly improve the feel of windowless spaces.
Dimmable Everything
Every light in your practice should be dimmable. The right light level changes throughout the day and varies by situation. A fixed-brightness light is inflexible and often wrong. Smart dimmer systems allow you to create "scenes" — preset lighting configurations for different times and activities.
Budget for lighting upgrade: $5,000-$15,000 for a complete lighting system across a typical 2,000-3,000 sq ft med spa. This includes fixtures, dimmers, and installation.
Color Palette and Materials
Choosing Your Color Palette
Your color palette should reflect your brand positioning:
| Brand Position | Primary | Secondary | Accent | Example Space |
|---|---|---|---|---|
| Modern luxury | Warm greige or clay | Black or dark metal | Deep green or burgundy | Boutique hotel lobby |
| Clean clinical | White | Light gray, natural wood | Subtle green (plants) | Premium dental office |
| Bold contemporary | Charcoal or deep navy | Warm cream or white | Brass or warm gold | Editorial studio |
| Organic wellness | Sand or terra cotta | Sage or olive | Raw wood, natural stone | High-end wellness retreat |
Rules regardless of palette:
- Limit to 3-4 colors maximum (one dominant, one secondary, one or two accents)
- Use your brand colors as accents, not as dominant wall colors
- Test colors in the actual space with the actual lighting before committing (colors look different under different light sources)
- Consistency across all spaces — the palette should flow seamlessly from reception to treatment rooms
Material Selection
Flooring:
| Material | Pros | Cons | Cost/sq ft | Best For |
|---|---|---|---|---|
| Large-format porcelain tile (24x24"+) | Durable, premium look, easy clean | Cold underfoot, hard surface | $8-$20 | Treatment rooms, restrooms |
| Luxury vinyl plank (LVP) | Wood look, durable, warm, easy install | Not as premium as real wood or stone | $4-$12 | Waiting areas, hallways |
| Natural stone (marble, travertine) | Stunning, ultimate premium | Expensive, requires sealing, cold | $15-$50+ | Reception accent, feature areas |
| Carpet | Avoid in med spas | Stains, hygiene, dated | N/A | Never (except private offices) |
Countertops:
- Quartz is the standard — durable, non-porous, wide range of options ($50-$120/sq ft installed)
- Natural stone (marble, granite) — beautiful but requires maintenance ($60-$200/sq ft installed)
- Avoid laminate — it looks and feels cheap regardless of the pattern
Furniture investment guidance:
- Invest in quality pieces that will last 7-10 years
- Performance fabrics (Crypton, Sunbrella) resist stains while looking premium
- Metal frames: choose one finish (brushed gold, matte black, or brushed nickel) and use it consistently throughout
Budget Planning for Med Spa Interior Design
Cost Per Square Foot
| Design Level | Cost/sq ft | Total for 2,500 sq ft | Result |
|---|---|---|---|
| Basic professional | $100-$175 | $250,000-$437,500 | Clean, functional, attractive |
| Premium | $175-$300 | $437,500-$750,000 | Custom millwork, premium finishes |
| Luxury | $300-$500+ | $750,000-$1,250,000+ | Architect-designed, custom everything |
Budget Allocation
For a typical 2,000-3,000 square foot med spa:
| Category | % of Budget | Example ($300K) | Notes |
|---|---|---|---|
| Construction/build-out | 40-50% | $120K-$150K | Walls, plumbing, electrical, HVAC |
| Fixtures and finishes | 15-20% | $45K-$60K | Flooring, countertops, cabinetry |
| Furniture | 10-15% | $30K-$45K | Seating, tables, treatment beds |
| Lighting | 8-12% | $24K-$36K | Fixtures, dimmers, installation |
| Equipment | 10-15% | $30K-$45K | Treatment devices, sterilization |
| Technology | 3-5% | $9K-$15K | AV, music system, scent diffusion |
| Design fees | 5-10% | $15K-$30K | Interior designer, architect |
| Contingency | 10% | $30K | Always budget for unexpected costs |
Where to Invest vs. Where to Save
Invest heavily in:
- Reception desk and waiting area (first impression — highest visibility)
- Lighting throughout (biggest impact per dollar across entire practice)
- Treatment beds (patients spend the most time here — comfort drives satisfaction)
- Flooring (hard to change later, affects the entire space)
Save on:
- Back-of-house areas (staff break room, storage, office — functionality over aesthetics)
- Artwork (buy from local artists or use high-quality prints in good frames)
- Accessories and decor (upgrade over time as revenue grows)
- Technology in waiting areas (a quality Bluetooth speaker is fine for music)
Renovating an Existing Space
If you are not doing a ground-up build but renovating an existing space, prioritize your investments in this order for maximum impact per dollar:
| Priority | Renovation | Budget Range | Impact | Timeline |
|---|---|---|---|---|
| 1 | Lighting upgrade | $5,000-$15,000 | Transforms the entire space | 1-2 weeks |
| 2 | Reception area refresh | $10,000-$25,000 | First impression transformation | 2-3 weeks |
| 3 | Paint and wall treatments | $3,000-$8,000 | Modernizes dated spaces overnight | 1 week |
| 4 | Treatment room updates | $3,000-$8,000/room | Direct patient experience upgrade | 1 week/room |
| 5 | Flooring replacement | $15,000-$40,000 | Biggest visual impact, most disruptive | 2-4 weeks |
Common renovation mistakes:
- Starting with flooring (most expensive, most disruptive — do it last unless the current flooring is a deal-breaker)
- Ignoring lighting (the cheapest renovation with the biggest impact is almost always lighting)
- Renovating piecemeal without a design plan (results in a mismatched space)
- Not planning for business continuity (close rooms in rotation, not all at once)
Design Trends to Embrace (and Avoid)
Embrace
Biophilic design. Bringing natural elements into the space — living plants, natural materials, organic shapes, natural light. This is not a trend that will date quickly; it is based on research showing that nature elements reduce stress and increase comfort. Perfect for a space where patients may feel anxious.
Curved furniture and organic shapes. After years of hard edges and straight lines, softer shapes are dominating commercial design. Curved reception desks, rounded mirrors, and organic-shaped accent tables feel contemporary and welcoming.
Warm metallics. Brushed gold and warm brass are replacing chrome and polished nickel. They add warmth and sophistication without feeling trendy.
Dark accent spaces. A dark-painted feature wall, dark-tiled bathroom, or moody consultation room creates drama and contrast within an otherwise light space. Used sparingly, it adds depth and interest.
Textured walls. Wood slat panels, stone veneer, fluted panels, and dimensional wall treatments add visual and tactile interest. They photograph well (good for social media) and feel premium.
Avoid
All-white everything. It photographs well but feels cold and clinical in person. Warm neutrals are more inviting and forgiving of wear.
Trendy wallpaper in permanent spaces. That bold botanical wallpaper looks amazing now. In three years, it will look dated. Use it in bathrooms or accent walls where it is easy to change, not in your main waiting area.
Rose gold fixtures. Already feeling dated. Brushed gold or satin brass have more longevity.
Exposed industrial elements. Exposed ductwork and raw concrete work for restaurants and co-working spaces, not for med spas. Patients want to feel pampered, not like they are in a loft.
LED light strips as primary lighting. LED accents are great. LED strips as the main light source in a room feels like a nightclub, not a medical practice.
Med Spa Design Ideas for the Patient Journey
Walk through your practice as if you were a first-time patient. Enter through the front door. Check in. Wait. Walk to the consultation room. Walk to the treatment room. Receive treatment. Walk to checkout. Leave.
At every point, ask:
| Touchpoint | Question | What to Look For |
|---|---|---|
| Entry door | Is it easy to find and inviting? | Clear signage, clean entrance, welcoming |
| First sight inside | What is the first thing I see? | Your logo, a welcoming space, or clutter? |
| Check-in | Does this feel like a medical office or a boutique? | Open desk vs. sliding window |
| Waiting | Am I comfortable and occupied? | Quality seating, beverages, reading material |
| Walk to treatment | Do I feel private and guided? | Clear wayfinding, no awkward encounters |
| Treatment room | Does this feel like a suite or an exam room? | Warm, clean, organized, premium |
| During treatment | Am I comfortable for the full duration? | Bed comfort, lighting, temperature, music |
| Post-treatment | Is the checkout process smooth? | Semi-private, not rushed, next appointment booked |
| Leaving | Do I want to come back? | Overall impression, desire to share |
If the answer to any of these questions is unsatisfactory at any point in the journey, you have found your next design investment.
Designing for Photography and Social Media
In 2026, your space is also a content creation tool. Patients photograph and share their experiences, and your team needs spaces for before/after photography and video content.
Implementation steps:
- Create one "Instagram-worthy" moment in the practice — a feature wall, a neon sign with your brand tagline, or a beautifully styled corner that patients want to photograph
- Ensure the reception area photographs well from multiple angles
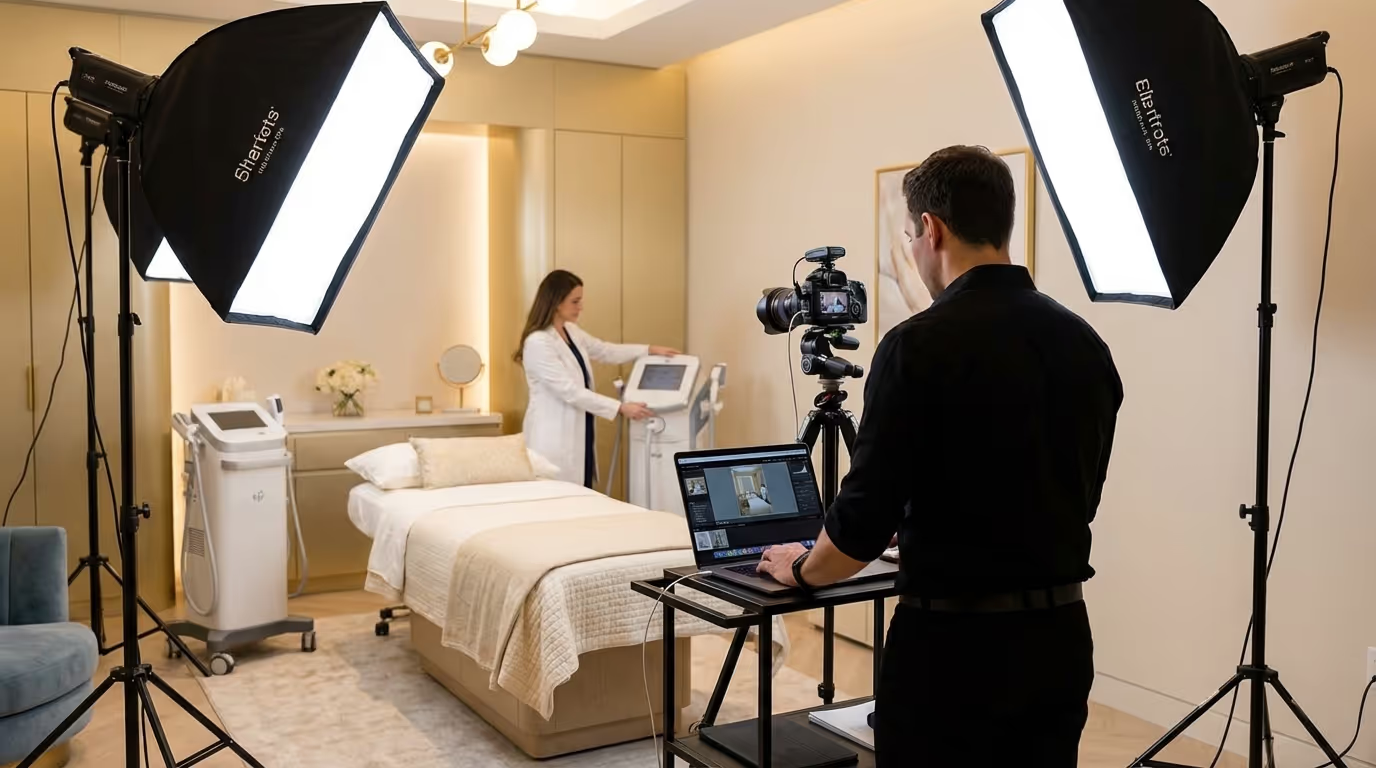
- Designate one treatment room as your primary photo/video room with consistent lighting setup
- Position mirrors and lighting in consultation rooms to be flattering for selfies
- Use your brand colors and logo in subtle but visible ways that appear in patient photos
Hallways, Restrooms, and Transition Spaces
These spaces get ignored in most designs but significantly affect the overall experience.
Hallways:
- Consistent flooring (no transitions from tile to carpet)
- Matching lighting (not a bright hallway between dimly lit rooms)
- Art or photography on walls — curated and properly framed
- Clear wayfinding signage
Restrooms:
- Spotlessly clean at all times (cleaning schedule, not reactive)
- Quality fixtures — solid faucets, proper mirror, flattering lighting
- Cloth hand towels or high-quality paper towels
- On-brand details: scented soap, small arrangement
- A lock that works reliably
Common mistake: Spending $200,000 on the reception and treatment rooms and having a restroom with a flickering fluorescent light and a soap dispenser from a janitorial supply catalog. Patients notice the inconsistency.
Working With Designers and Contractors
Hiring an Interior Designer
For a med spa build-out, hire a designer with healthcare or commercial hospitality experience. They understand building codes, ADA requirements, compliance considerations, and the unique needs of medical spaces.
What to look for:
- Portfolio with medical, wellness, or hospitality projects
- Understanding of medical building code requirements
- Experience with commercial-grade materials
- Ability to work within your budget
- References from completed projects
Budget for design services: 5-10% of total build-out cost. For a $300,000 project, expect $15,000-$30,000 in design fees. This investment prevents costly mistakes during construction.
Managing the Build-Out
Implementation steps:
- Complete design before starting construction (changes during construction are 3-5x more expensive)
- Get three contractor bids based on identical specifications
- Build in 10% contingency for unexpected costs
- Create a detailed timeline with milestones
- Visit the site weekly during construction
- Do not make design changes during construction unless absolutely necessary
- Plan for a 2-4 week buffer beyond the projected completion date
Your Space Is a Marketing Tool
Your space is not just where you deliver treatments. The best med spa design ideas turn your space into a marketing tool, a pricing justification, and a patient retention system. Design it accordingly.
Every dollar invested in creating a premium patient experience pays dividends through higher per-treatment pricing, better rebooking rates, increased retail revenue, referrals, and organic social media exposure.
The practices that understand this do not see med spa interior design as a cost. They see it as one of their most powerful competitive advantages — from the med spa waiting room design to the treatment rooms, every detail is visible from the moment a patient walks through the door and stays with them long after they leave.
Want to know how your practice's presentation — from your medical spa layout ideas to your digital presence — compares to the competition? Get Your Free Marketing Audit — we will evaluate every patient touchpoint and show you where your med spa design ideas can drive more revenue.