
Your best salesperson is not your website. It is not your Google Ads. It is not even your five-star reviews.
It is a well-executed before and after photo.
Nothing converts a prospective patient faster than visual proof of results. A single compelling set of med spa before and after photos does what a thousand words of marketing copy cannot — it removes doubt. It shows, rather than tells, that you can deliver the outcome they are looking for.
And yet, the majority of med spas are terrible at photography. Inconsistent lighting. Different backgrounds. One photo taken on an iPhone 12 in the hallway, the other taken three months later in a different room with different makeup on the patient. The result is not trust — it is suspicion.
Bad before and after photos do not just fail to convert. They actively damage your credibility. They make patients wonder if you are hiding something or, worse, faking results.
This guide covers everything you need to build a med spa photography system that produces professional, consistent, trust-building visual content — without hiring a full-time photographer or spending $20,000 on equipment. We will cover equipment, lighting, protocols, legal requirements, post-processing, platform-specific strategies, and how to measure whether your photography is actually driving revenue.
Why Photography Is Your Highest-ROI Marketing Asset
Before we get into the technical details, let us talk about why med spa photography deserves more investment than most practice owners give it.
The Data Behind Visual Proof
Visual proof outperforms every other content type. On Instagram, before and after posts consistently generate 2-3x more engagement than any other content type for med spas. On your website, pages with strong before and after galleries convert at 30-45% higher rates than pages without them. In consultations, providers who show relevant before and afters close at significantly higher rates.
Patients research visually. When someone is considering Botox, fillers, or a body contouring procedure, the first thing they do is look at results. They go to Instagram. They go to RealSelf. They go to your website gallery. If your visual content is weak, they move on to a competitor whose content is strong — regardless of who is actually the better provider.
Content compounds over time. A single set of high-quality before and after photos can be used across your website, Instagram, Facebook, Google Business Profile, email campaigns, consultation materials, and paid ads. One photo shoot generates months of content across every channel.
Photography builds your reputation. Practices known for great results photography attract both patients and providers. Top injectors want to work at practices that showcase work well. Patients refer friends because they can show them visual proof.
The Revenue Impact of Professional Photography
| Photography Quality | Website Gallery Conversion | Social Media Engagement | Consultation Close Rate | Patient Referral Rate |
|---|---|---|---|---|
| No before/afters | 1.5-2.5% | 1-2% | 40-55% | 10-15% |
| Inconsistent quality | 2.5-4% | 2-3% | 55-65% | 15-20% |
| Professional, consistent | 5-8% | 4-8% | 70-85% | 25-40% |
The difference between "no before/afters" and "professional, consistent" is often the difference between a struggling practice and a thriving one. For a practice generating 5,000 monthly website visitors, moving from 2.5% to 6% conversion means an additional 175 leads per month. At a CPA of $200-300, that represents $35,000-52,500 in equivalent marketing value — every month, from a one-time system investment.
The Equipment You Actually Need
You do not need a professional studio to take professional-quality med spa photos. You need consistency, decent equipment, and a system.
Camera Options
Best option: A dedicated mirrorless or DSLR camera.
You do not need the latest $3,000 body. A mid-range mirrorless camera with a good lens will produce better results than any smartphone. Recommended setups:
| Camera System | Total Cost | Best For | Key Advantage |
|---|---|---|---|
| Sony a6400 + 50mm f/1.8 | $1,000-1,500 | Best all-around option | Excellent autofocus, great color |
| Canon EOS R50 + RF 50mm f/1.8 | $900-1,200 | Budget-friendly quality | Easy to use, reliable color |
| Nikon Z50 + 50mm f/1.8 | $1,000-1,300 | Strong alternative | Sharp images, natural skin tones |
| Sony a7 III + 85mm f/1.8 | $1,800-2,500 | Best portrait quality | Full-frame sensor, superior detail |
The 50mm focal length is ideal for face and body photography. It does not distort facial features the way wider lenses do, and it produces a flattering, natural perspective. For practices with larger photo areas, an 85mm lens provides even more flattering compression.
Acceptable option: A recent iPhone or Samsung flagship.
If budget is a constraint, a recent smartphone (iPhone 15 Pro or newer, Samsung S24 or newer) can produce usable results — but only if you follow every other protocol in this guide. The camera is not the limiting factor for most med spas. Lighting and consistency are.
What to avoid:
- Do not let different staff members use their personal phones
- Do not use front-facing cameras
- Do not use portrait mode or beauty filters — ever. These defeat the entire purpose of clinical photography
- Do not use Instagram or any filtered app to capture images
- Do not switch between phone and dedicated camera between before and after shots
Lighting Setup
Lighting is the single most important factor in med spa photography. More than the camera, more than the background, more than anything else. Bad lighting makes good results look mediocre. Good lighting makes good results look extraordinary.
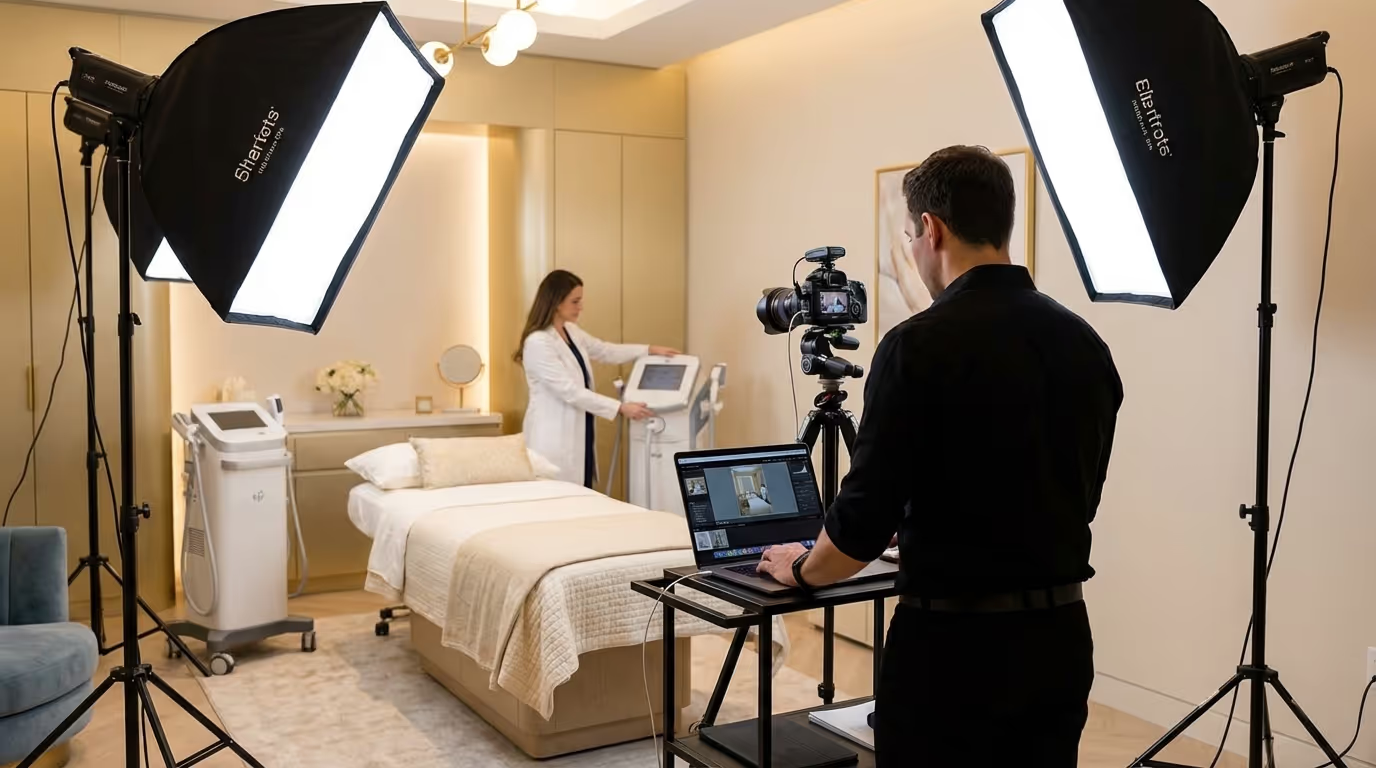
The recommended setup: Two continuous LED panels.
| Equipment | Estimated Cost | Specifications |
|---|---|---|
| 2x Neewer or GVM LED panels with stands | $150-300 (pair) | Bi-color, dimmable |
| Color temperature setting | N/A | 5500K (daylight balanced) |
| Position | N/A | 45-degree angles, either side of patient, eye level |
| Intensity | N/A | Both panels at equal intensity |
Continuous lights are better than flash for med spa photography because you can see exactly what the photo will look like before you take it. This matters when your staff — not professional photographers — are taking the shots.
Advanced lighting setup for premium results:
For practices that want the best possible photo quality, add:
- A third LED panel above and behind the patient (hair light / separation light) — $75-150
- A reflector panel opposite the key light to fill shadows — $20-30
- A ring light as supplemental face lighting for close-up shots — $50-100
Avoid overhead fluorescent lighting. It creates unflattering shadows under the eyes and chin. If you cannot invest in dedicated lights, use a room with large windows and shoot during daylight hours with the patient facing the window.
Lighting troubleshooting guide:
| Problem | Cause | Solution |
|---|---|---|
| Dark shadows under eyes/chin | Light source too high | Lower light panels to eye level |
| One side of face brighter | Unequal panel intensity | Match both panels to identical power |
| Skin looks orange/yellow | Color temperature too warm | Set panels to 5500K (daylight) |
| Skin looks blue/cold | Color temperature too cool | Verify 5500K setting, check for competing ambient light |
| Shiny/reflective hot spots | Light panels too close or too intense | Move panels back 1-2 feet, reduce intensity |
| Flat, dimensionless photos | Lights too evenly positioned | Slightly offset one light for subtle modeling |
Background
Use a solid, neutral background. A plain gray or light blue backdrop eliminates distracting elements and ensures consistency. A collapsible backdrop stand with a gray muslin or paper roll costs $50-100 and takes 30 seconds to set up.
Background options ranked:
| Background Type | Cost | Pros | Cons |
|---|---|---|---|
| Gray seamless paper roll | $30-50 | Perfect consistency, replaceable | Tears over time, needs stand |
| Gray muslin backdrop | $20-40 | Durable, washable, portable | Can wrinkle (iron before each use) |
| Painted wall (medium gray) | $100-200 (one time) | Permanent, always ready | Requires dedicated space |
| Light blue seamless paper | $30-50 | Flattering for skin tones | Less versatile than gray |
| White backdrop | $20-40 | Available but not recommended | Causes exposure issues, reflects light onto skin |
Do not use: Treatment room walls with equipment visible, hallways, bathrooms, or any location where the background changes between photos. The background must be identical in the before and the after.
Accessories
- Tripod or wall-mounted camera bracket. The camera must be at the exact same height and distance for every photo. Handheld shots introduce inconsistency. Budget: $30-100 for a quality tripod.
- Tape marks on the floor. Mark exactly where the patient stands and where the tripod sits. Use gaffer tape (not masking tape, which leaves residue). Every photo, every time, same position.
- Color reference card. A gray card or color checker card ensures accurate color reproduction. Hold it in the first frame of each session for white balance reference. Budget: $10-25.
- Height-marked wall tape. Mark heights on the wall near the backdrop so you can quickly position the camera at the correct height for each patient.
- Consent forms. Printed, ready to sign. Never take a photo without written consent that specifies how the image may be used. We will cover the legal details below.
- Dedicated storage device. A practice-owned SD card or device — never personal phones. Budget: $20-50 for a high-capacity SD card.
Total Equipment Investment Summary
| Setup Level | Equipment | Total Cost | Quality Level |
|---|---|---|---|
| Minimum viable | Smartphone + 2 LED panels + backdrop + tripod | $250-500 | Good |
| Recommended | Mirrorless camera + lens + 2 LED panels + backdrop + tripod + accessories | $1,500-2,500 | Professional |
| Premium | Full-frame camera + portrait lens + 3-light setup + permanent backdrop wall + accessories | $3,000-5,000 | Studio-quality |
The recommended setup is the sweet spot for most med spas. It produces professional-quality results that rival $500/session photography studios, and the equipment pays for itself within weeks through improved content quality.
The Standardized Photo Protocol
Equipment is only half the equation. The other half is a repeatable process that any team member can follow and produce consistent results.
Step 1: Consistent Patient Preparation
Before every photo session:
- Remove all makeup, moisturizer, and sunscreen. For facial treatments, the patient's face should be clean and bare. Makeup changes the appearance of results and undermines credibility.
- Pull hair back. Use a headband or clips to keep hair away from the face. Hair position should be identical in before and after photos. Provide standardized headbands in a neutral color.
- Remove jewelry. Earrings, necklaces, and glasses create visual differences that distract from results.
- Use a standard drape or garment. For body treatments, provide a consistent garment — a black or gray camisole for chest/neck photos, specific draping for body contouring. Do not let patients wear their own clothing, as it introduces variability.
- Clean the skin. Use a gentle cleanser and allow 2-3 minutes for any redness from cleansing to subside before photographing.
Patient preparation checklist (print and post in photo area):
- [ ] Consent form signed
- [ ] Makeup, moisturizer, sunscreen removed
- [ ] Hair pulled back with neutral headband
- [ ] Jewelry removed
- [ ] Standard garment/draping applied (if body treatment)
- [ ] Skin cleansed and redness subsided
- [ ] Patient positioned on floor marks
- [ ] Camera height verified
- [ ] Lighting checked (both panels on, equal intensity, 5500K)
Step 2: Standardized Angles
For every treatment type, define and document the exact angles you will capture. Print a visual reference guide and mount it next to your photo station.
Face treatments (Botox, fillers, chemical peels, facials):
- Front-facing, neutral expression (mouth closed, eyes forward)
- 45-degree right (patient turns head 45 degrees to their left)
- 45-degree left (patient turns head 45 degrees to their right)
- Right profile (90 degrees)
- Left profile (90 degrees)
- Optional: looking up (for under-chin treatments like Kybella)
- Optional: animated expression (smiling for crow's feet, frowning for "11" lines)
Body treatments (CoolSculpting, body contouring, skin tightening):
- Front-facing (arms at sides or hands on hips — standardize the position)
- 45-degree right
- 45-degree left
- Right profile
- Left profile
- Optional: close-up of treatment area
Skin treatments (laser, microneedling, IPL):
- Close-up of treatment area, before and after
- Medium shot for context
- Same distance, same zoom level, both photos
- Macro lens or close-up mode for fine texture detail
Implementation steps:
- Create a visual guide poster showing each angle with a stick figure or diagram
- Mount the poster at eye level next to your photo station
- Create a treatment-specific checklist that the photographer follows (which angles to capture for each treatment type)
- Practice with staff members before using the system on patients
Step 3: Camera Settings
Lock these settings and do not change them between before and after photos:
| Setting | Value | Why |
|---|---|---|
| Mode | Manual (or Aperture Priority) | Prevents exposure shifts between shots |
| ISO | 200-400 | Low noise, clean images |
| Aperture | f/5.6-f/8 | Full face/body in sharp focus |
| Shutter speed | Adjust for proper exposure | Depends on your lighting setup |
| White balance | 5500K (or custom from gray card) | Consistent color across sessions |
| File format | RAW (dedicated camera) or HEIC/ProRAW (phone) | Maximum editing flexibility |
| Focus mode | Single-point AF | Precise focus on the patient |
| Flash | Off (using continuous LED panels) | Consistent, preview-able lighting |
If using a smartphone: lock the exposure by tapping and holding on the patient's face, use the 1x lens (not ultra-wide), and shoot in the native camera app — not Instagram or any filtered app.
Critical rule: Take a test shot and review it on the camera screen before each session. Check for:
- Correct exposure (face properly lit, no blown highlights)
- Correct white balance (skin looks natural, not orange or blue)
- Correct focus (eyes sharp)
- Correct framing (centered, consistent with your standard)
Step 4: Timing
This is where most med spas fail. They take the "before" photo and then forget to take the "after," or they take it at the wrong time.
Document and standardize your timing protocol:
| Treatment | Before Photo | After Photo | Follow-up Photo |
|---|---|---|---|
| Botox | Day of treatment (pre-injection) | 2 weeks post | 3 months (at next appointment) |
| Dermal fillers | Day of treatment (pre-injection) | Immediately after + 2 weeks post | 6 months (at next appointment) |
| Chemical peels | Day of treatment | 2-4 weeks post (fully healed) | After series completion |
| Laser treatments | Day of treatment | 4-6 weeks post | After full series completion |
| Body contouring | Day of treatment | 8-12 weeks post (final results) | 6 months (maintenance check) |
| Microneedling | Day of treatment | 4-6 weeks post | After full series completion |
| RF treatments | Day of treatment | 6-8 weeks post | After series + 3 months |
| IPL/Photofacial | Day of treatment | 3-4 weeks post | After full series |
| Weight loss (GLP-1) | Program start | Monthly progress | Program milestone photos |
Implementation steps:
- Build "after photo" reminders into your EMR or scheduling system
- When booking the follow-up appointment, add a note: "AFTER PHOTO DUE"
- Include photo capture as a step in the treatment completion workflow
- Assign a team member as the "photo champion" responsible for ensuring no after photos are missed
- Review weekly: how many treatments were performed vs. how many before/after sets were captured
Step 5: File Management
A photo you cannot find is a photo that does not exist. Build a filing system from day one.
Naming convention: PatientID_Treatment_Date_Angle.jpg
Example: P2847_Botox_20260715_Front.jpg
Folder structure: `` /photos /patients /P2847 /botox-2026-07 before/ after/ /approved-for-marketing /botox /fillers /body-contouring /coolsculpting /laser /microneedling /weight-loss /practice /interior /team-headshots /events /products ``
Only photos with signed consent and patient approval move to the "approved for marketing" folder. Keep clinical records separate from marketing assets.
File management tools:
- Google Drive or Dropbox (for basic file storage and sharing)
- Adobe Lightroom (for photo organization, tagging, and batch editing)
- Practice-specific EMR photo modules (PatientNow, Nextech, AestheticsPro)
- Dedicated CRM with photo storage capabilities
Legal Requirements: Consent and Compliance
This is non-negotiable. Every patient photo requires explicit, written consent before you use it for any marketing purpose. HIPAA does not just protect health records — it protects any individually identifiable health information, and a photo of a patient receiving aesthetic treatment qualifies.
What Your Consent Form Must Include
- Specific use cases. List exactly where the photos may appear: website, social media, print materials, advertising, educational presentations, third-party review platforms.
- Duration. How long you retain the right to use the images. Most practices use "in perpetuity" but some patients prefer a defined period (1 year, 3 years).
- Revocation clause. The patient can revoke consent at any time, and you will remove the images within a specified timeframe (30 days is standard).
- De-identification options. Some patients consent to photos but want identifying features obscured (eyes blacked out, cropped to treatment area only). Document their preference.
- Compensation clause. State clearly whether patients receive any compensation for the use of their images (many practices offer a treatment discount of $25-100 in exchange for photo and marketing consent).
- Separate from treatment consent. The photo/marketing release must be a separate document from the treatment consent form. Bundling them together can create legal issues.
- Signature and date. Both the patient and a practice representative.
HIPAA Considerations
- Never post photos with patient names, dates of birth, or other identifying information.
- Do not tag patients on social media unless they explicitly request it.
- Store consent forms securely — treat them like any other patient record.
- Train every staff member who handles photos on HIPAA photo requirements. This training should be part of your compliance program.
- Have your consent form reviewed by a healthcare attorney. Do not use a template from the internet without legal review.
- Separate clinical photos from marketing photos in your storage system. Clinical photos are part of the medical record; marketing photos require separate authorization.
State-Specific Regulations
Some states have additional requirements for before and after photos in medical advertising:
| State | Additional Requirements |
|---|---|
| California | Before/after photos in advertising must include disclaimer about typical results |
| New York | Specific restrictions on the use of patient images in medical advertising |
| Texas | Must include supervising physician's name in advertising that features patient results |
| Florida | Standard FTC requirements apply; Department of Health monitors compliance |
Check with your state medical board and a healthcare marketing attorney. Fines for non-compliant before-and-after advertising range from $5,000-50,000 per incident.
FTC Compliance for Before-and-After Photos
The Federal Trade Commission has specific rules about the use of before-and-after photos in advertising:
- Photos must represent typical results, not just best-case outcomes
- Photos must not be digitally altered to exaggerate results
- When showing exceptional results, include a disclaimer: "Individual results may vary"
- If results shown are not typical, the ad must clearly state what the typical consumer would achieve
- Photos must be from actual patients, not stock photography or AI-generated images
Common mistake: Many med spas only show their most dramatic transformations. The FTC considers this potentially misleading if those results are not representative of what most patients experience. Include a range of results — from subtle improvements to dramatic changes — to stay compliant.
Post-Processing: Enhancement vs. Deception
Here is the line: you can optimize photos for consistency and clarity. You cannot alter results.
Acceptable Post-Processing
| Adjustment | Purpose | How to Apply |
|---|---|---|
| Cropping | Consistent framing between before and after | Crop both images to identical dimensions and composition |
| White balance correction | Identical color temperature in both images | Match to gray card reference or use auto-match |
| Exposure matching | Same brightness in both images | Adjust exposure to match, never to flatter |
| Color correction | Account for lighting differences between sessions | Calibrate to reference card, match skin tone baseline |
| Background cleanup | Remove distracting elements that slipped into frame | Clone stamp or content-aware fill on background only |
| Logo/watermark addition | Protect intellectual property | Small, semi-transparent, consistent placement |
| Blemish removal (non-treatment area) | Remove temporary blemishes unrelated to the treatment | Only on the "after" image, only for elements clearly unrelated to treatment (e.g., a scratch on the chin when the treatment was forehead Botox) |
Never Acceptable
- Smoothing skin texture or using beauty filters
- Adjusting contours (making a jawline sharper, a nose thinner)
- Changing skin color beyond white balance correction
- Removing blemishes, scars, or features that were present in the "before"
- Using different zoom levels to exaggerate results
- Using different lighting to make results look more dramatic
- Adding saturation or contrast differently between before and after
- Using AI enhancement tools that modify facial features or skin quality
If a patient or prospective patient ever discovers you have altered before and after photos, your credibility is destroyed. Not damaged — destroyed. In the age of social media, that kind of exposure can end a practice.
Batch Editing Workflow
For efficiency, develop a batch editing workflow:
- Import all images from the session into Lightroom or your editing tool
- Apply base correction (white balance from gray card, exposure matching) to one image
- Sync settings to all images from the same session
- Crop all images to standardized dimensions
- Add watermark to all images destined for marketing use
- Export in two formats: high-resolution for print/website (3000px wide, JPEG quality 90%) and web-optimized for social media (1500px wide, JPEG quality 80%)
- File into the appropriate folders per your naming convention
This workflow takes 10-15 minutes per session once you have developed your presets.
Building a Before & After Gallery That Converts
Having great photos is step one. Presenting them effectively is step two.
Website Gallery Best Practices
Organize by treatment, not by date. A patient looking for Botox results wants to see a Botox gallery. They do not want to scroll through 200 mixed photos looking for relevant results.
Show variety within each treatment. Include different ages, skin types, and areas treated. A prospective patient needs to see someone who looks like them to feel confident in the outcome.
Use slider tools. Interactive before/after sliders (where users drag a line across the image to reveal the before and after) are more engaging than side-by-side photos. They increase time on page by 25-40% compared to static galleries.
Include treatment details. Under each photo set, note:
- Treatment performed
- Number of sessions or units
- Time between before and after photos
- Any relevant context (e.g., "Photos taken 2 weeks post-treatment, no makeup")
Do not include patient names or any identifying details.
Feature your best work prominently. Your most dramatic, high-quality results should be at the top of each gallery and featured on your homepage. The first impression matters.
Gallery page optimization for conversions:
| Element | Implementation | Impact on Conversion |
|---|---|---|
| Treatment-specific galleries | One gallery page per treatment type | +20-30% vs. mixed galleries |
| Before/after slider | Interactive slider widget | +25-40% time on page |
| Patient count | "View our 347 Botox results" | +15% trust signal |
| CTA after every 3-4 result sets | "See these results in person — book a consultation" | +10-15% conversion |
| Filtering/sorting | Filter by treatment area, age range, or concern | +20% engagement |
| Mobile optimization | Touch-friendly sliders, fast-loading images | +30% mobile conversion |
Social Media Photo Strategy
Instagram is your primary platform for before and after content. The visual format is perfect, and aesthetic-related hashtags have massive reach.
Posting strategy:
- Carousel posts perform best — put the "after" first (it gets the click), then reveal the "before" in the second slide, with treatment details in the third. This format gets 1.4x more reach than single images.
- Reels showing transformations (quick reveal format) consistently outperform static posts in reach and engagement. A 15-second before-to-after reveal Reel can reach 10-50x more people than a static post.
- Stories for less-polished, day-of content — show the patient (with consent) excited about their results.
- Post 3-5 before and after sets per week if you have the inventory. Consistency matters more than volume.
Platform-specific photo formatting:
| Platform | Optimal Format | Dimensions | Best Presentation |
|---|---|---|---|
| Instagram Feed | Carousel | 1080x1350px (4:5) | After first, before second, details third |
| Instagram Reels | Video reveal | 1080x1920px (9:16) | Dramatic before-to-after transition |
| Instagram Stories | Casual/authentic | 1080x1920px (9:16) | Quick result share, poll "can you tell?" |
| TikTok | Video reveal | 1080x1920px (9:16) | Trending audio + transformation |
| Side-by-side or carousel | 1200x628px or square | Side-by-side with detailed caption | |
| Google Business Profile | Photo upload | 720px minimum | Include treatment type in description |
| Website | Slider or side-by-side | 1500-3000px wide | High-res with interactive slider |
Hashtag strategy for before and after posts:
- Treatment-specific: #botoxbeforeandafter, #fillerresults, #coolsculptingresults, #microneedlingresults
- Location-specific: #[yourcity]medspa, #[yourcity]botox, #[yourcity]aesthetics
- General: #medsparesults, #aestheticresults, #beforeandaftermedspa
- Branded: #[YourPracticeName]Results
- Limit to 15-20 relevant hashtags per post
Watermark every image. Your logo, small and semi-transparent, in a corner. This protects your content from being stolen by competitors (it happens constantly) and builds brand recognition when photos are shared.
Google Business Profile
Google Business Profile allows you to upload photos directly to your listing, and practices with more photos receive significantly more direction requests and website clicks.
- Upload your best before and after sets to your GBP
- Add them to the appropriate category (if available)
- Include treatment details in the photo description
- Upload new photos weekly — Google rewards active listings
- Track photo views in GBP Insights to see which images perform best
Using Photos in Paid Advertising
Before-and-after photos are among the highest-performing ad creatives for med spas. However, there are platform-specific rules:
- Before/after photos are generally allowed in Google Ads
- Must comply with healthcare advertising policies
- Results disclaimer required
- No exaggerated claims about typical results
Meta Ads (Facebook/Instagram):
- Meta has strict policies about before/after images
- Photos must not imply negative self-perception
- Avoid close-ups that could be flagged by automated review
- Focus on "after" results rather than dramatic before/after comparisons
- Use carousel format to show results without side-by-side that may trigger disapproval
- Before/after photos in retargeting ads convert at 2-3x the rate of generic imagery
- Show treatment-specific results to visitors who viewed that treatment's page
- Include a strong CTA: "See your results — book a free consultation"
Creating a Photo Content Calendar
Do not treat photography as an afterthought. Build it into your practice operations.
Daily Protocol
- Every patient who consents to photos gets photographed at their appointment using your standardized protocol
- "After" photos are taken at the appropriate follow-up interval
- All files are named and stored according to your system
- Staff confirms consent form is complete and filed
Weekly Tasks
- Review the week's photos and select the best sets for marketing use (30 minutes)
- Edit and prepare 3-5 sets for social media posting (45 minutes)
- Upload new photos to your website gallery and Google Business Profile (15 minutes)
- Check for outstanding "after" photos that need to be captured at upcoming appointments
Monthly Tasks
- Audit your gallery for gaps — which treatments need more representation?
- Identify patients with outstanding "after" photos that need to be captured
- Review consent forms for any expirations or revocations
- Update your website gallery with new additions
- Analyze photo performance metrics (which images drive the most engagement and conversions)
Quarterly Tasks
- Hire a professional photographer for 2-4 hours to capture high-end patient transformations, provider headshots, and practice imagery. Budget: $500-1,500 per session.
- Review and refresh your website's featured before and after sections
- Analyze which types of photos generate the most engagement and conversions
- Update your equipment if needed (new backdrops, replacement bulbs, additional lights)
Beyond Before & After: Other Photography Your Practice Needs
Before and after photos are your core visual asset, but your practice needs more than clinical photography to build a complete brand.
Practice Interior Photography
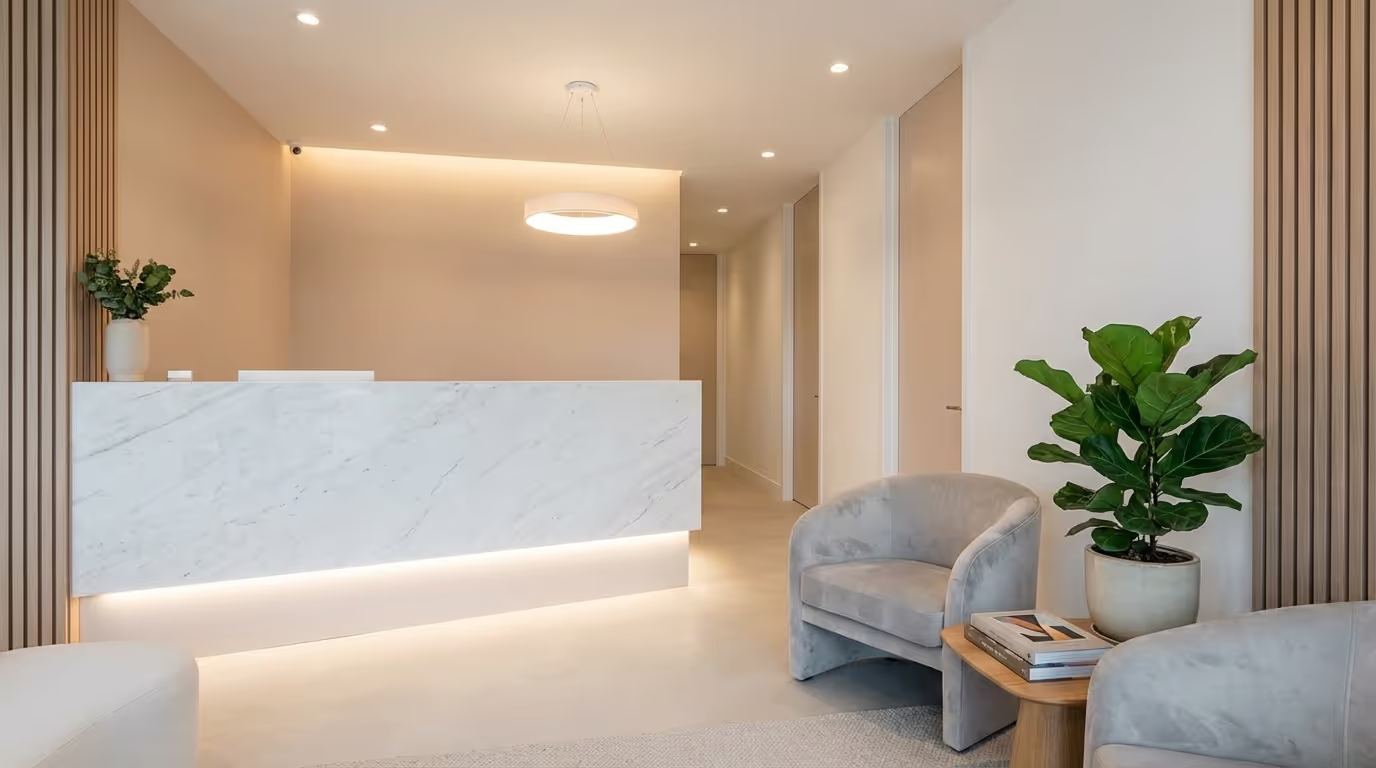
Your space is part of your brand. Professional photos of your treatment rooms, waiting area, and consultation rooms should appear on your website and social media. These photos tell patients what to expect before they walk in the door.
Interior photography checklist:
- [ ] Reception/waiting area (multiple angles)
- [ ] Treatment rooms (2-3 rooms, showing variety)
- [ ] Consultation room setup
- [ ] Retail product displays
- [ ] Hallways and common areas
- [ ] Exterior/entrance
- [ ] Signage
Tips:
- Shoot when the practice is clean, organized, and empty of patients
- Use wide-angle lenses (but avoid extreme distortion)
- Capture natural light whenever possible
- Style the space — fresh flowers, neatly arranged products, clean surfaces
- Reshoot when you renovate or update your space
- Maintain consistent design aesthetic in photos
Provider Headshots
Every provider on your team needs a professional headshot. Not a selfie, not a photo from their wedding — a headshot that matches your brand aesthetic.
- Consistent background and lighting across all providers
- Professional attire aligned with your brand (lab coat, scrubs, or business casual — choose one standard)
- Warm, approachable expressions — patients are trusting these people with their face
- Update annually or when providers change
- Budget: $200-500 for a photographer to shoot the entire team in one session
Behind-the-Scenes Content
This is the content that humanizes your brand. Behind-the-scenes photos and videos show the personality behind the practice and build emotional connection.
- Team meetings and celebrations
- Treatment preparation (without patient-identifying details)
- Product arrivals and new equipment
- Training sessions and continuing education
- Community events and practice milestones
This content performs exceptionally well on Instagram Stories and TikTok. It does not need to be polished — authenticity is the point.
Product Photography
If you sell skincare products, supplements, or other retail items, photograph them professionally. Good product photography directly impacts retail revenue.
- Clean, consistent background (white or branded)
- Multiple angles
- Lifestyle shots (products arranged in a skincare routine, on a bathroom counter)
- Close-ups of labels and key ingredients
- Consistent lighting that matches your brand aesthetic
Common Photography Mistakes That Kill Credibility
After working with hundreds of med spas, here are the mistakes we see most often — ranked by severity.
Critical Mistakes (Fix Immediately)
Mistake 1: Inconsistent lighting between before and after. The before is taken under fluorescent lights in a treatment room, the after is taken near a window. The lighting difference makes it impossible to evaluate actual results. Fix: Same lights, same settings, every time. This is the single most important rule in clinical photography.
Mistake 2: Different distances and angles. The before is a close-up, the after is taken from two feet further back. Or the head is tilted differently. Fix: Floor marks, tripod, standardized angles. The camera does not move between sessions.
Mistake 3: Makeup in the after photo. The patient comes in for their follow-up appointment wearing full makeup. You take the "after" photo. Now the results look enhanced by cosmetics, not by your treatment. Fix: Clean face protocol for all photo sessions, no exceptions. Have makeup remover wipes at your photo station.
Mistake 4: Using stock photography for results. Never, under any circumstances, use stock photos as before and after images. It is unethical, potentially illegal, and an instant credibility killer if discovered. If you do not have enough of your own results yet, be patient and build your library organically.
Serious Mistakes (Fix This Month)
Mistake 5: Only showing dramatic results. If every before and after on your website shows an extreme transformation, patients will have unrealistic expectations. Show the full range — subtle improvements are still improvements, and they set honest expectations. This also keeps you FTC compliant.
Mistake 6: Not having enough variety. If your Botox gallery only shows 30-year-old women, a 55-year-old woman considering Botox has no relevant reference point. Represent diverse ages, skin tones, and treatment areas.
Mistake 7: Forgetting to watermark. Your competitors will steal your best photos. We have seen it happen dozens of times. A semi-transparent logo in the corner takes two seconds to add and protects your work.
Moderate Mistakes (Improve Over Time)
Mistake 8: Not capturing enough angles. Front-facing only misses improvements visible from the side. Capture all standardized angles for every session.
Mistake 9: Poor file management. Photos saved in random phone galleries, unnamed, unfiled. When you need a specific result for an ad campaign or consultation, you cannot find it. Fix: Implement the naming and folder system above.
Mistake 10: No system for capturing "after" photos. Without a reminder system, 40-60% of potential after photos are lost because patients come in and leave without being photographed. Fix: Build photo reminders into your scheduling system and make photo capture part of the appointment workflow.
Measuring the Impact of Your Photography
Good photography is an investment. Like any investment, you should measure its return.
Key Photography Metrics
| Metric | How to Track | Benchmark | Action if Below Benchmark |
|---|---|---|---|
| Gallery page views | Google Analytics | 500+ views/month | Improve SEO and internal linking to gallery |
| Gallery time on page | Google Analytics | 2+ minutes average | Improve gallery UX, add more results, add sliders |
| Gallery-to-booking conversion | GA4 event tracking | 5-10% of gallery viewers book | Add CTAs within gallery, improve form placement |
| Social B&A engagement rate | Platform analytics | 4-8% on Instagram | Improve photo quality, test different formats |
| Consultation close rate with B&As | Provider tracking | 70-85% | Train providers on using photos in consultations |
| Photo capture rate | Internal tracking | 80%+ of eligible patients | Improve workflow, add reminders, assign champion |
| After photo completion rate | Internal tracking | 60%+ of before photos have matching afters | Build reminders into scheduling system |
Monthly Photography ROI Calculation
- Count the number of new patients who cited before-and-afters as a decision factor (ask in intake or consultation)
- Multiply by average first-visit revenue
- Add estimated value of social media engagement driven by B&A content
- Subtract photography costs (equipment amortized + editing time + staff time)
- Result = Monthly photography ROI
For most practices, photography ROI exceeds 10:1 once the system is established. The equipment is a one-time cost, the marginal cost of each additional photo session is near zero (staff time only), and the content compounds across channels for months or years.
Building Your Photography System: The 30-Day Plan
Week 1: Equipment and Setup
- Purchase camera (or designate a practice smartphone), lights, backdrop, and tripod
- Set up a dedicated photo area in your practice (ideally 6x8 feet minimum)
- Mark floor positions with gaffer tape
- Create your consent form (have it reviewed by an attorney)
- Set up the file storage system (folders, naming convention)
- Estimated investment: $500-2,500 depending on equipment level
Week 2: Protocol and Training
- Document your photo protocol (print it and post it in the photo area)
- Create treatment-specific angle reference guides
- Train every team member who will take photos — practice sessions using staff as models
- Set up camera settings and save them as a preset
- Practice the full workflow: consent → prep → shoot → file → review
- Assign a "photo champion" who owns the system
Week 3: Start Shooting
- Begin capturing before photos for every consenting patient
- Start scheduling "after" photo appointments
- Take practice interior and provider headshots
- Shoot product photography for retail items
- Begin building your filing system with real patient data
Week 4: Content Distribution
- Edit your first batch of before and after photos
- Upload to your website gallery (organize by treatment)
- Post your first before and after content on social media
- Upload photos to Google Business Profile
- Build your ongoing photo content calendar
- Set up the weekly and monthly review cadence
Ongoing: Optimization and Scaling
- Month 2: Analyze first month's photo performance metrics
- Month 3: Refine protocol based on feedback and results
- Month 6: First quarterly professional photographer session
- Month 12: Full photography system audit — update equipment, refresh protocols, expand gallery
The Competitive Advantage of Great Photography
In a market where most med spas treat photography as an afterthought, investing in consistent, professional visual content gives you a disproportionate advantage.
Prospective patients will compare your results gallery to your competitors' results gallery. If yours is polished, consistent, well-organized, and extensive while theirs is a disorganized mess of iPhone photos with different lighting — you win the comparison before they even pick up the phone.
The practices we work with that implement this photography system see measurable improvements within 60 days:
- 30-50% increase in gallery page engagement
- 20-35% improvement in social media engagement rates on before-and-after content
- 15-25% improvement in consultation close rates when providers use standardized photos
- 2-3x increase in usable marketing content per month
Great photography is not vanity. It is the most efficient trust-building tool you have. Every dollar you invest in building a professional photography system pays dividends across every marketing channel, every patient touchpoint, and every consultation.
Your results speak for themselves. Make sure the photos do too.
Get Your Free Marketing Audit
Not sure if your current visual content is helping or hurting your practice? We will review your before and after galleries, social media content, and website imagery, and show you exactly what is working, what is not, and what to fix first.
Every audit includes a photography assessment, content performance analysis, and a prioritized action plan. We work exclusively with med spas — one vertical, one obsession.